Add a Camera
Preview cameras, what a camera rig is, and where cameras live in a rig.
Every rig already has a camera living inside it. By the end of this lesson you will know where it lives, how to add more, and exactly where cameras belong in the Kilona pipeline.
Welcome to the Cameras course. So far you have built rigs and placed models in them. Now you are going to decide how the viewer actually sees that work. That decision belongs to the camera.
Here is where cameras fit in the pipeline. Cameras are part of the rig. You define them inside the rig, and later, when the rig is placed in a scene, those cameras are how you frame the shot. They matter beyond the preview too: when you render a scene, the output is captured through the active camera. The camera you set up here is the camera your final video sees through.
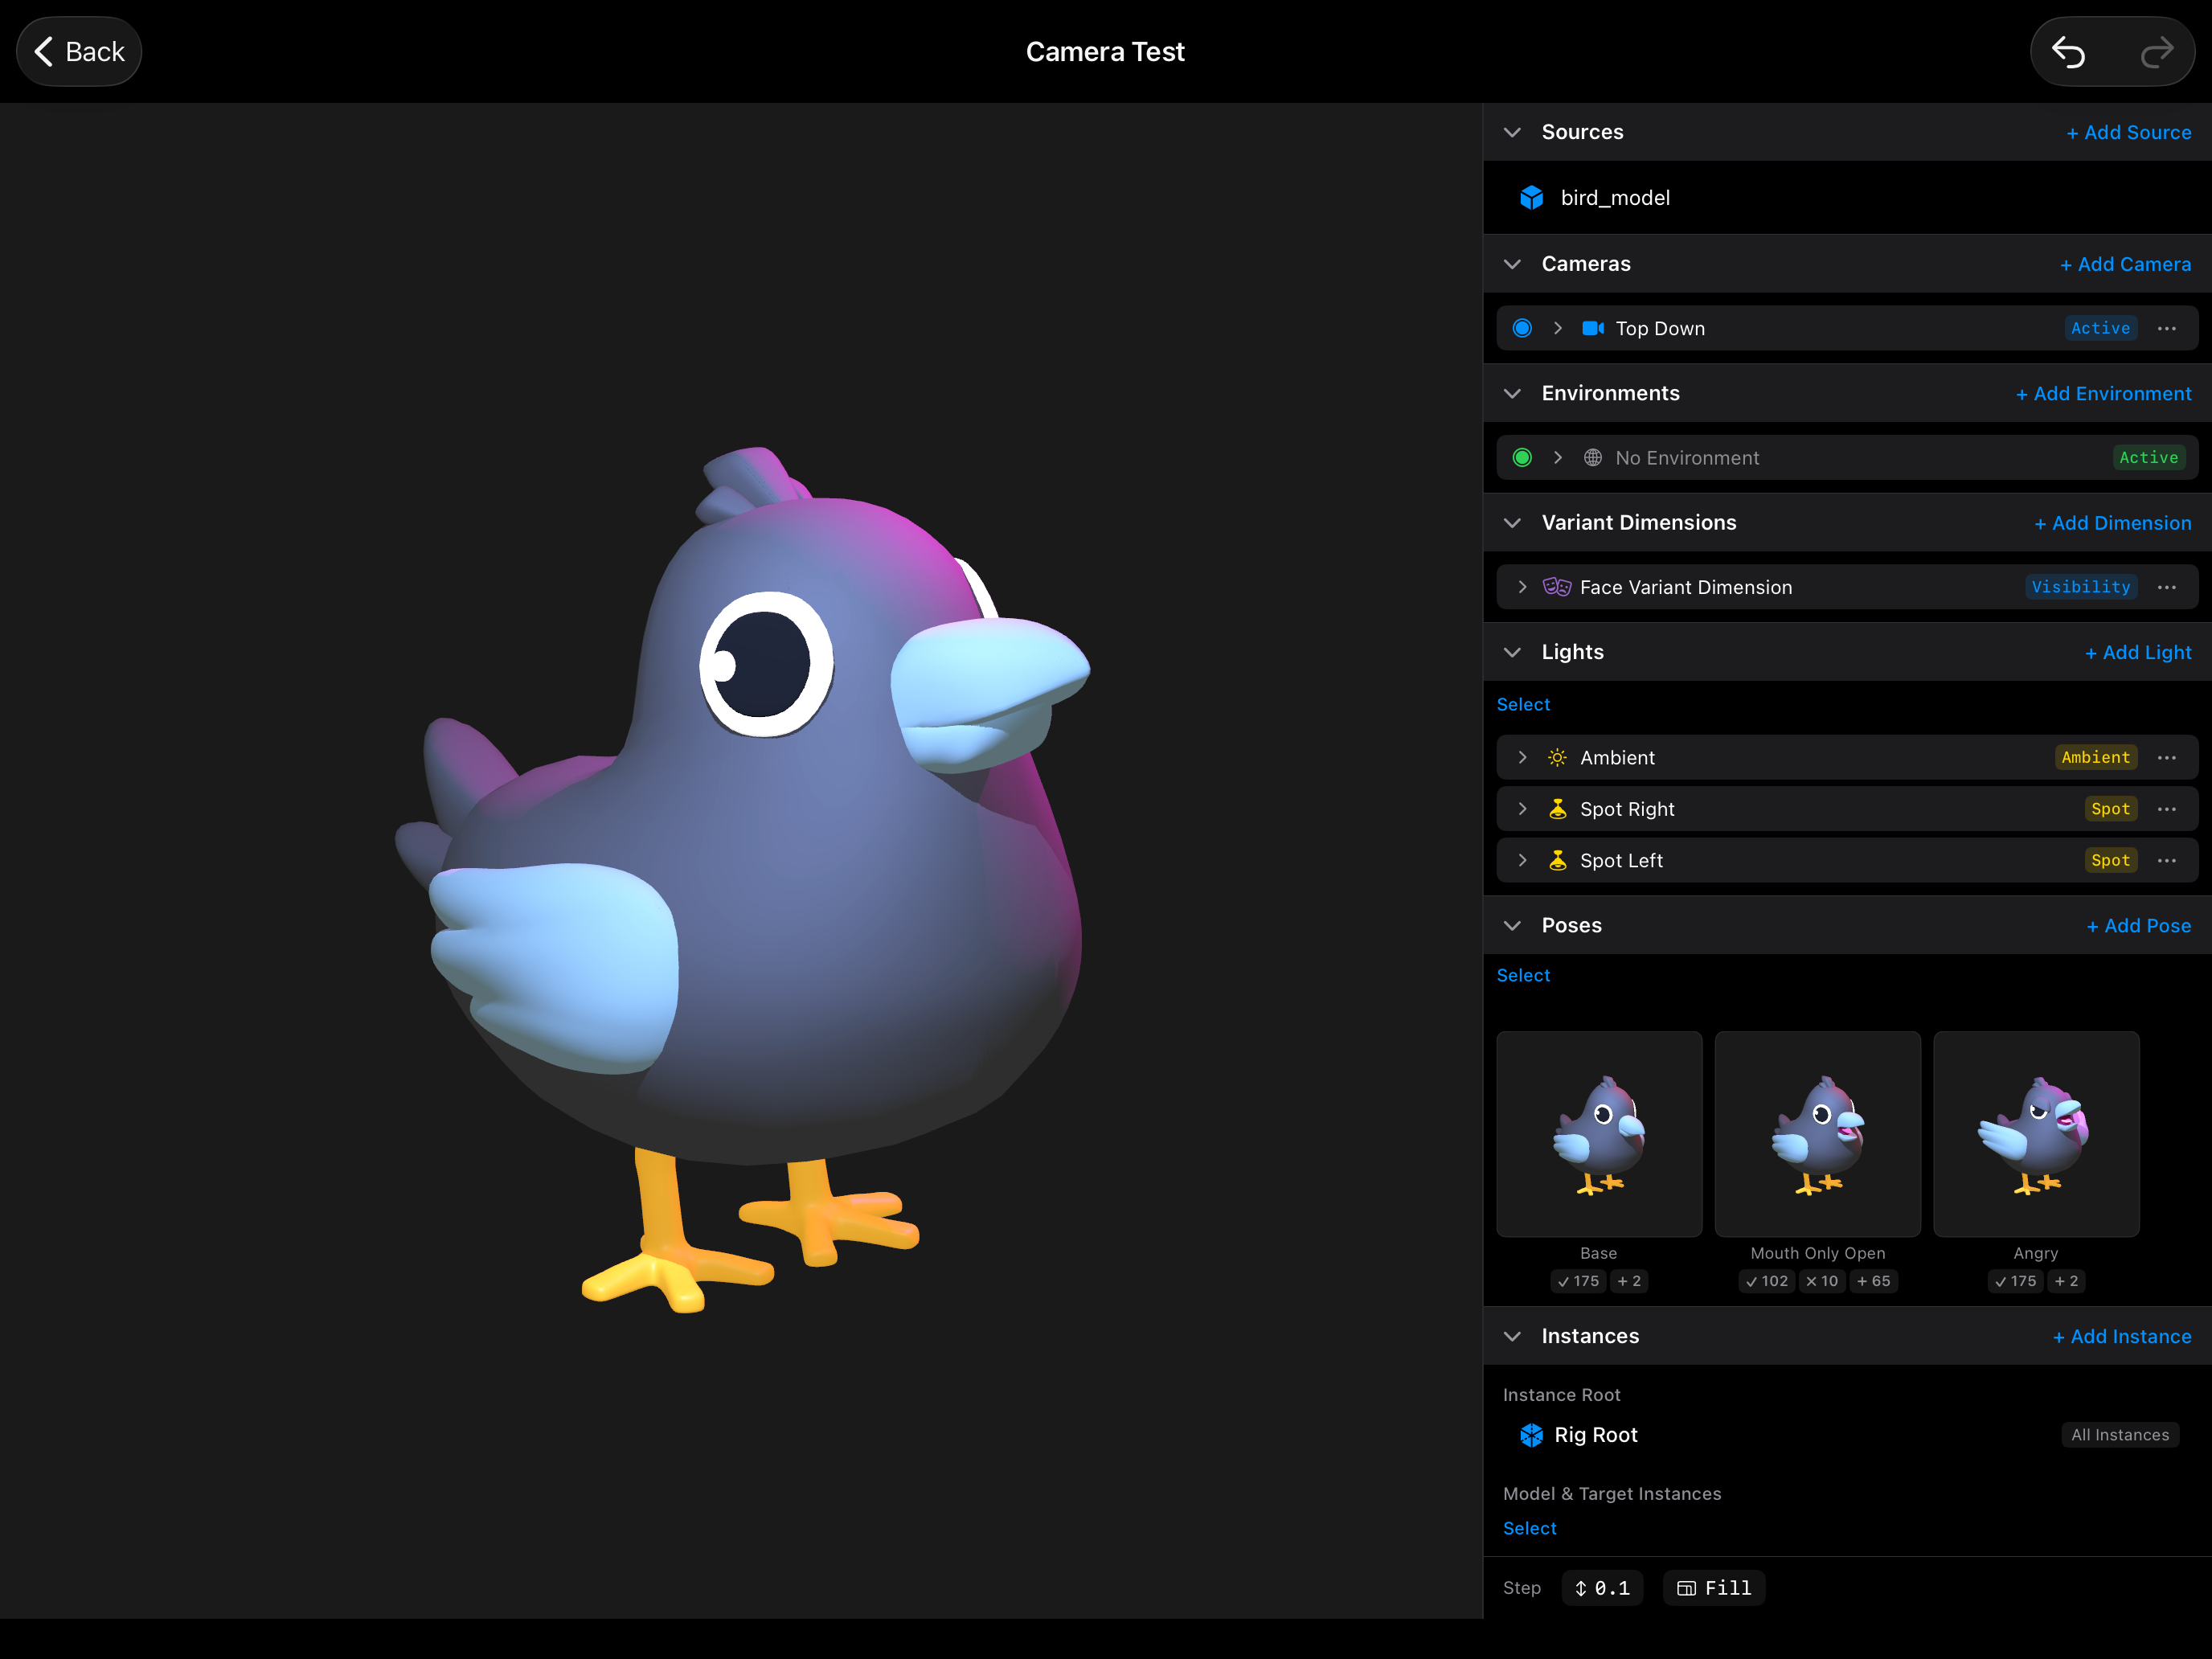
Open a rig with a model in it. Scroll the rig panel and find the Cameras section. That is where cameras live, and it is never empty: every rig comes with a camera from the moment it is created, and Kilona will not let you delete the last one. A rig always has a point of view.

Tap the camera in the list. The viewport cuts to show you what that camera sees. This is a preview camera: a saved point of view that lives with the rig. Think of it as a framing you can always come back to. Eventually these cameras will be brought into the scene and used for preview and rendering. however in the rig editor they are only for preview and setting up the various angles you want to have quick access to.
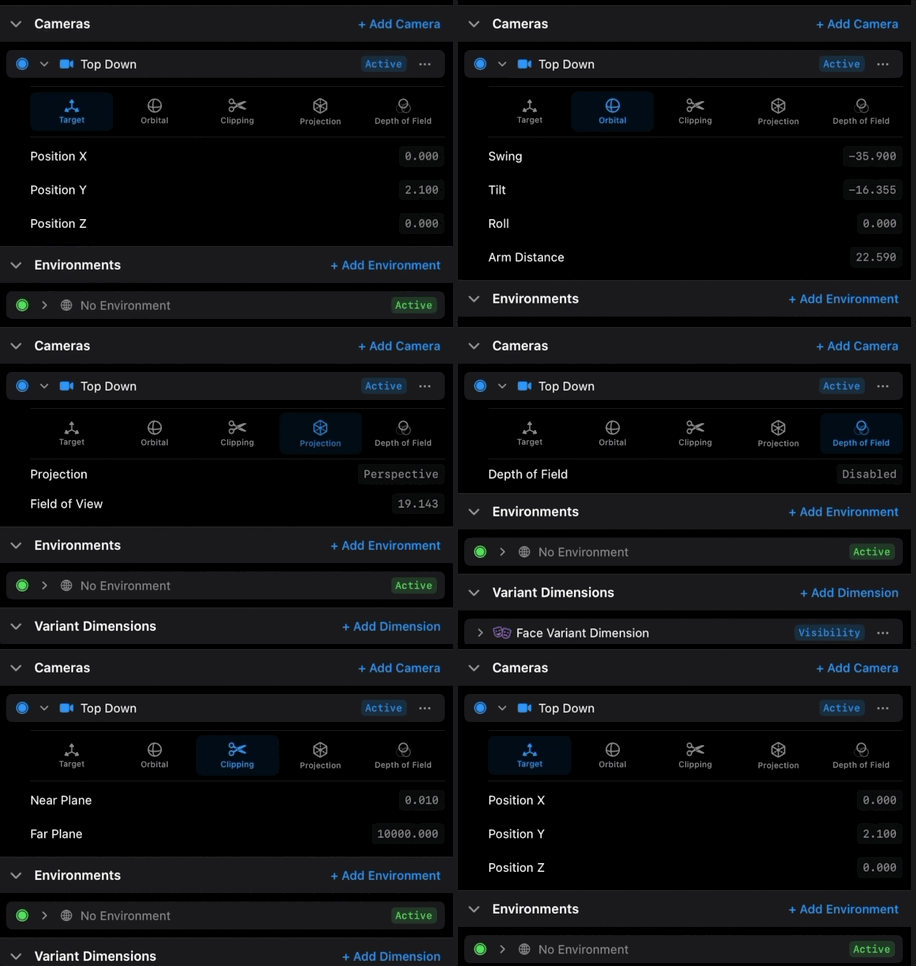
That same tap opens the camera editor. Across the top you will see five tabs: Target, Orbital, Clipping, Projection, and Depth of Field. Those five tabs are the entire camera system, and this course walks through every one of them. For now, take the quick tour. Target sets the point the camera cares about. Orbital moves the camera around that point. Clipping controls how near and how far the camera can see. Projection shapes the lens. Depth of Field controls focus.
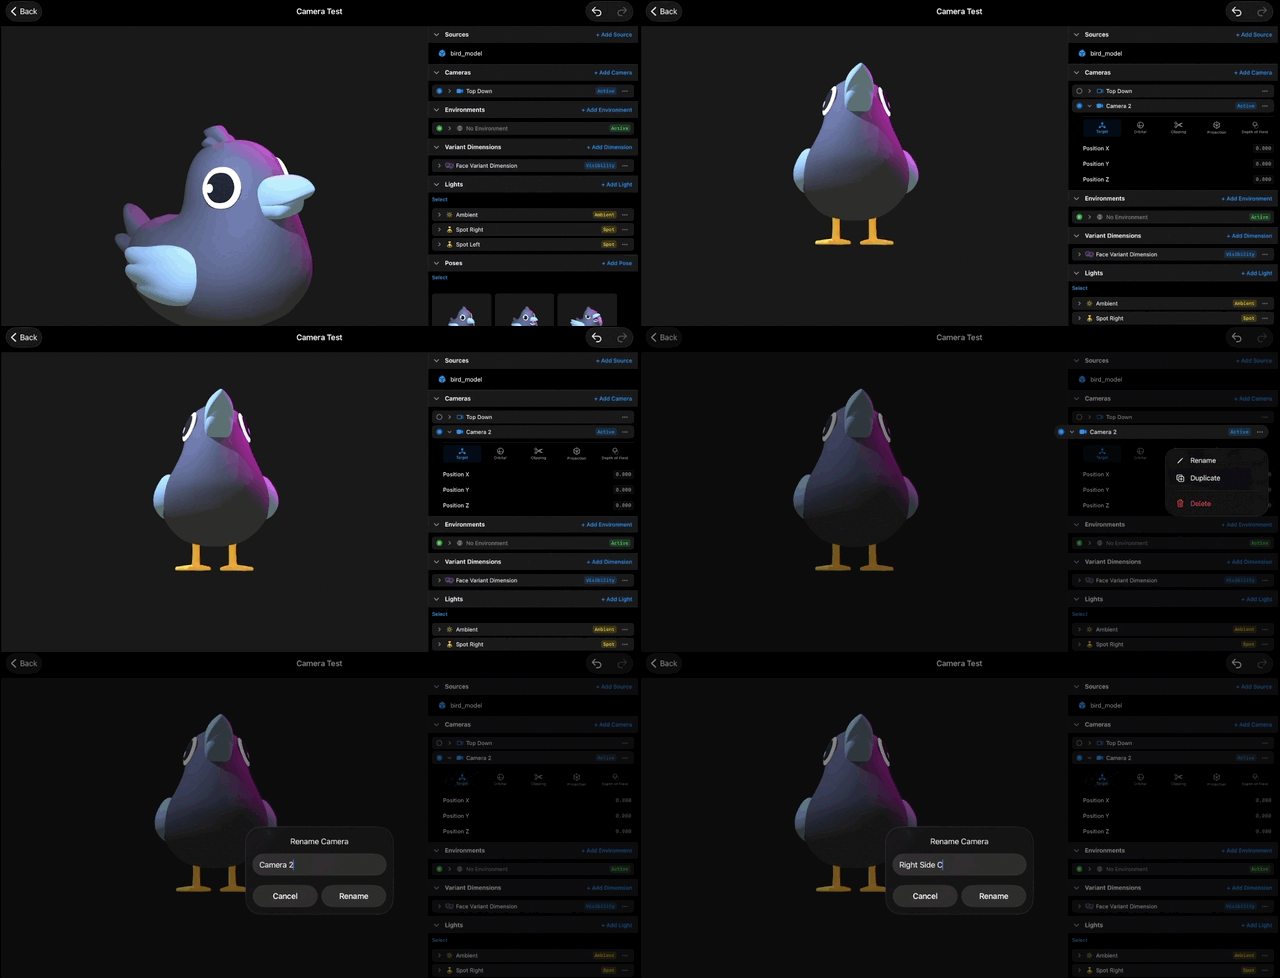
One rig can hold several preview cameras. Go back to the Cameras section and tap Add Camera. Now you have two. Maybe one is a wide establishing view and the other is a tight close-up. Tap between them and watch the viewport cut from one framing to the other. Only one camera is active at a time, so you are always looking through exactly one of them.
So which one does a scene use? The live camera is chosen with the Active Camera binding, and bindings are their own course. But one detail is worth knowing now: under the hood, every binding is a single number value moving up and down. Active Camera is a selection binding, which means it reads that number as a choice. Zero and above picks a camera by position in your list: zero is the first camera, one is the second, and so on. So every camera you add here becomes another choice on that list, and switching cameras later is as simple as changing one number.
Before we move on, rename your camera to "Right Side Camera".
That is the setup: every rig has at least one camera, you can add several more, and five tabs control everything about each one. The rest of this course goes tab by tab.
Recap
- Every rig comes with a camera in its Cameras section, and the last one can never be deleted. Tap Add Camera to add more.
- A preview camera is a saved point of view that travels with the rig.
- A rig can hold several cameras, but only one is active at a time.
- The camera editor has five tabs: Target, Orbital, Clipping, Projection, and Depth of Field.
- Switching the live camera happens through the Active Camera binding, covered in the Bindings course.