How a Kilona Camera Works
The five values that pose every camera: target position, Swing, Tilt, Arm Distance, and Field of View.
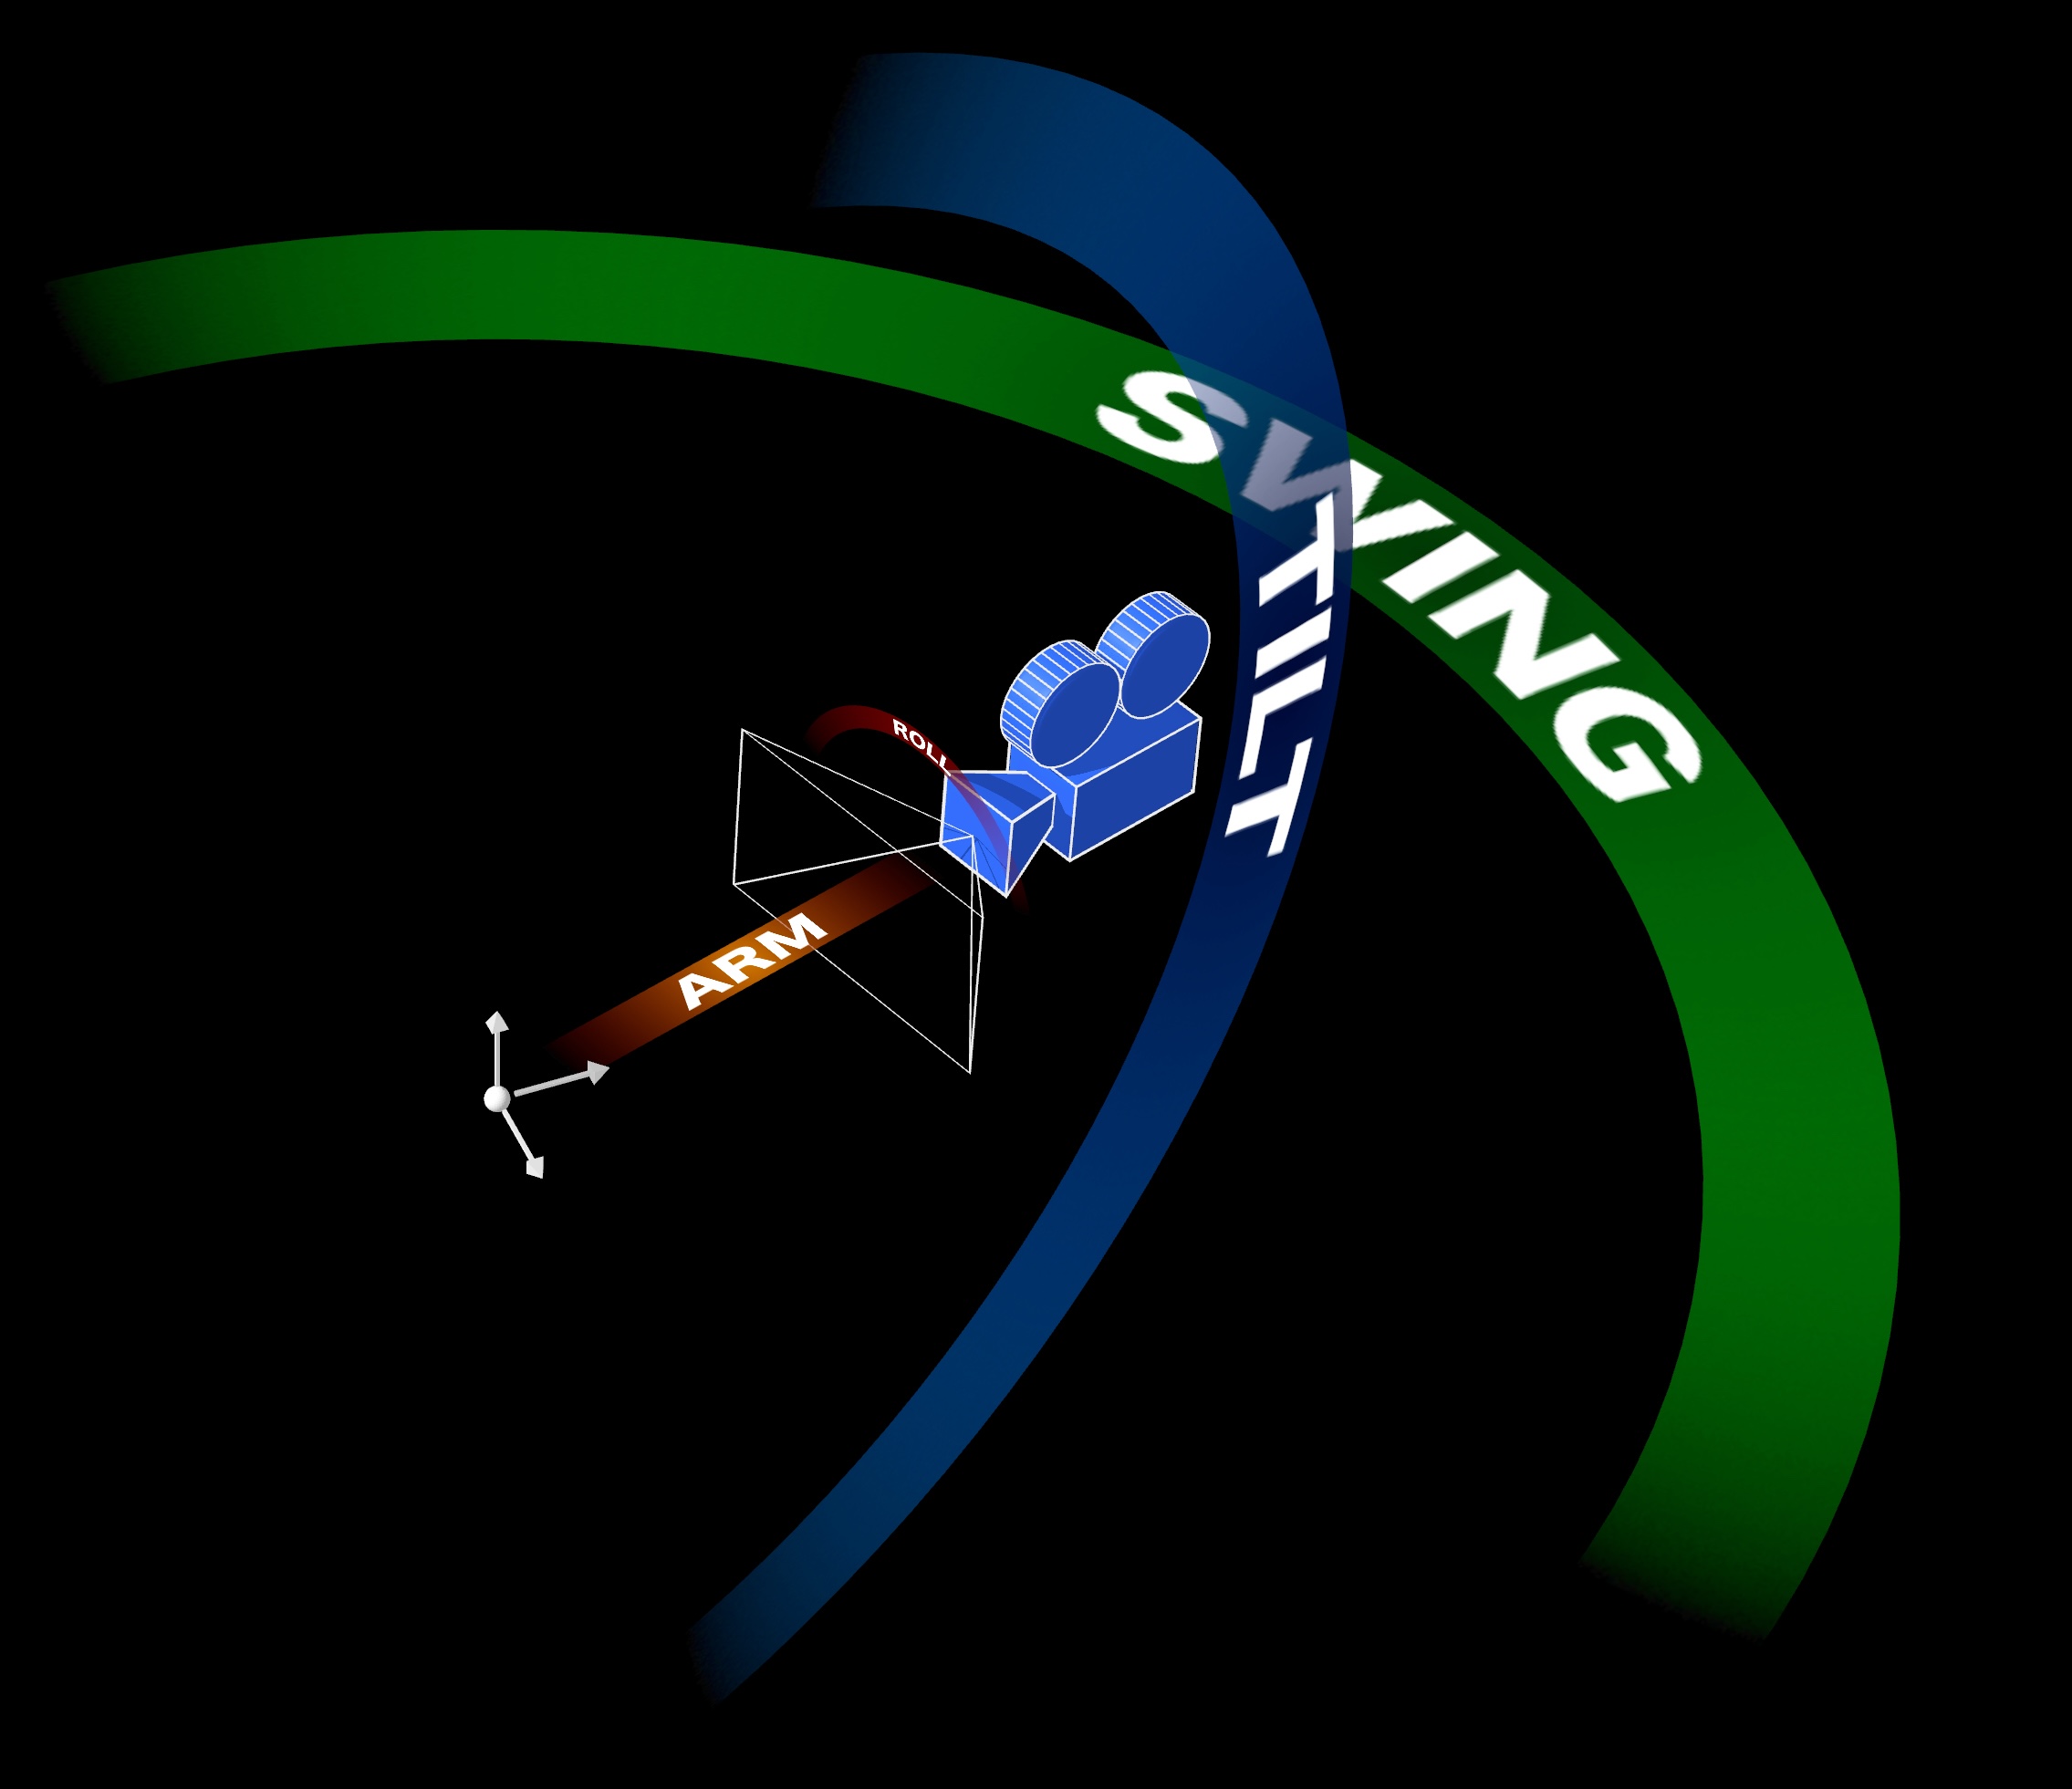
Six properties pose every camera in Kilona: a target, three rotations, an arm, and a lens. Understand those six, and you can frame any shot in seconds.
Before we go tab by tab, let's step back and look at the big idea, because Kilona cameras work a little differently than cameras in many other 3D programs, and the difference is the whole reason they are fast to use.
In a lot of 3D software, the camera is a free-floating object. It has a position in space and a rotation in space, and it is up to you to fly it around and aim it by hand. Getting a good angle means juggling rotation matrices and any sort of complex motion seems cumbersome at a minimum, and it is easy to end up pointed at nothing.
Kilona takes a different approach. A Kilona camera is built around what it is looking at. Instead of asking where the camera is, you answer six simpler questions, and each one is a single value.
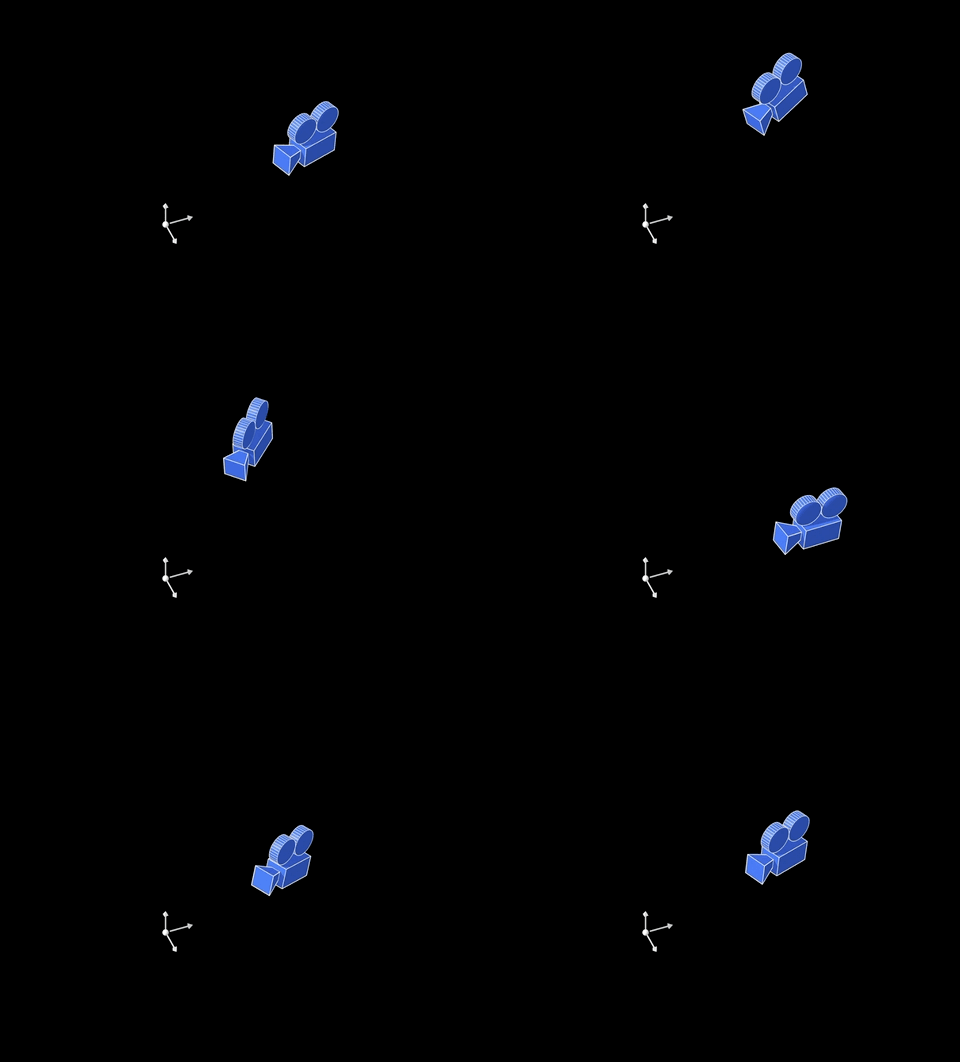
First: the target position. This is the point in space the camera cares about, usually your subject. Everything else pivots around it.
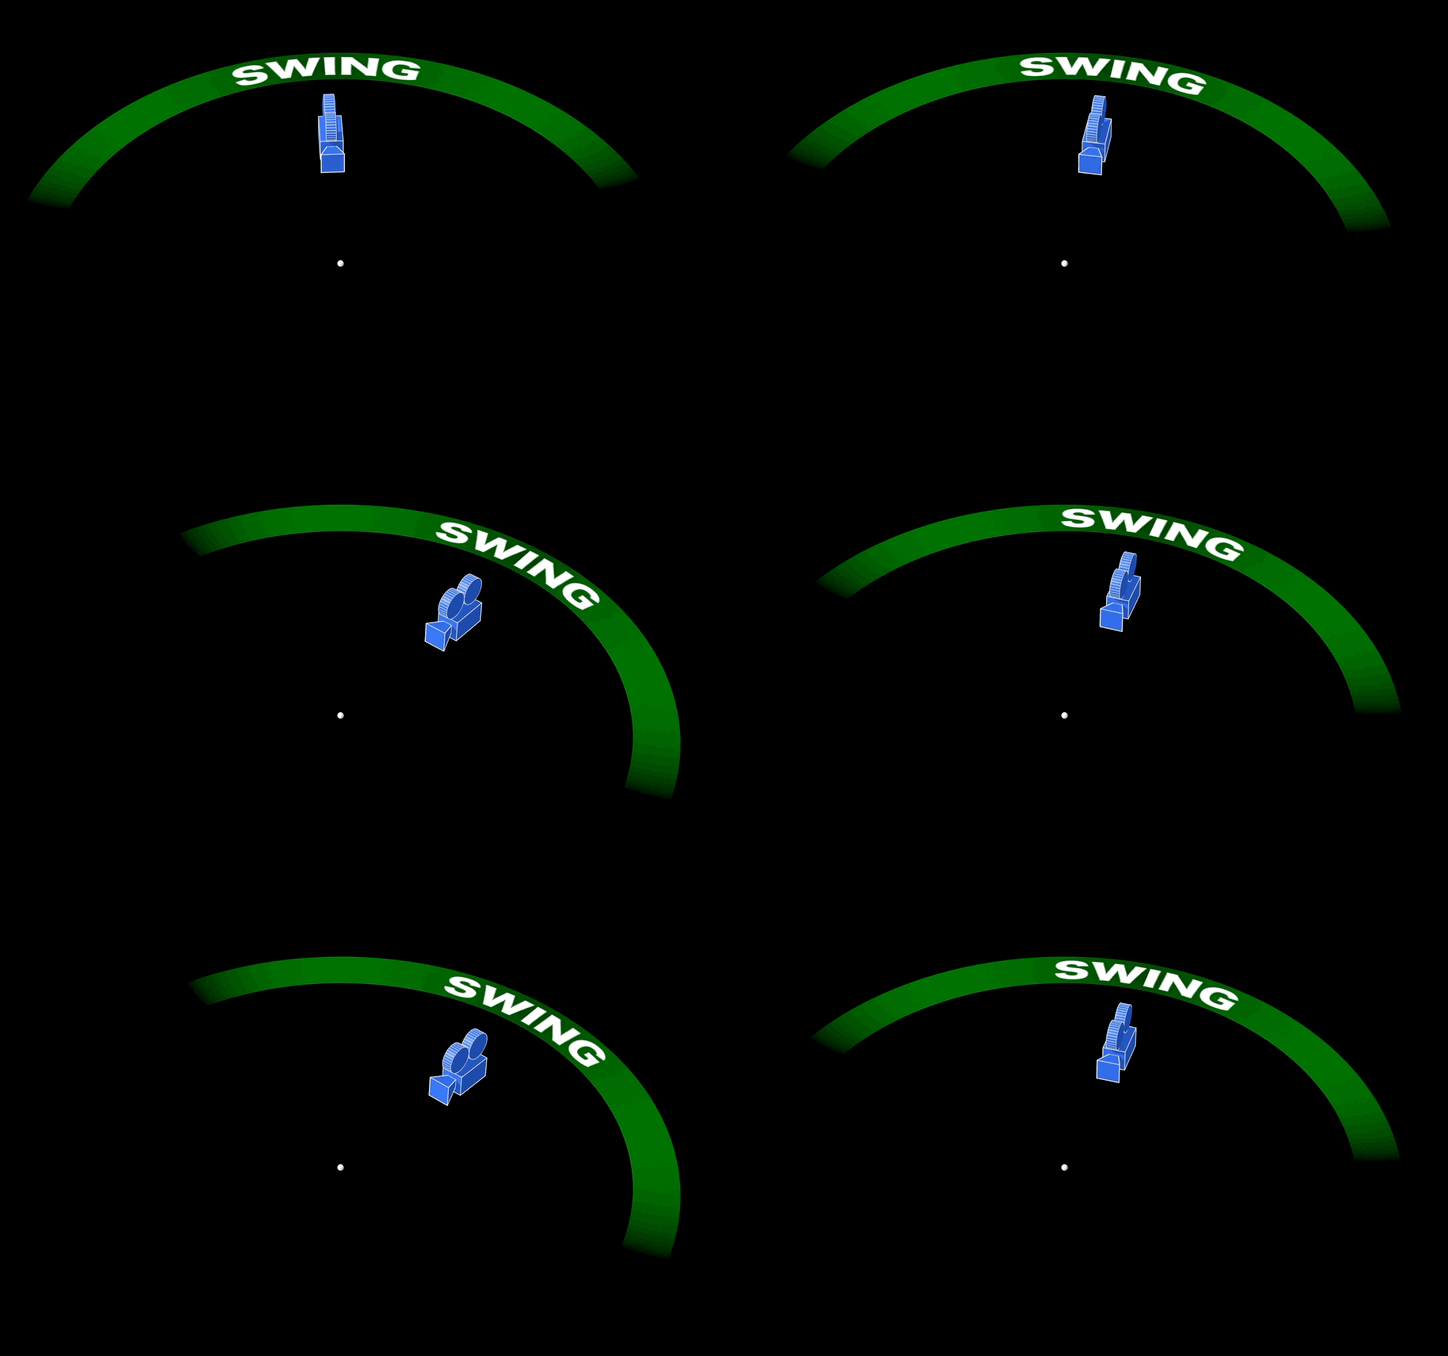
Second: rotation around the vertical axis. That is Swing. It circles the camera around the target, so it answers: from which side am I looking? Front, profile, back, or anywhere in between.
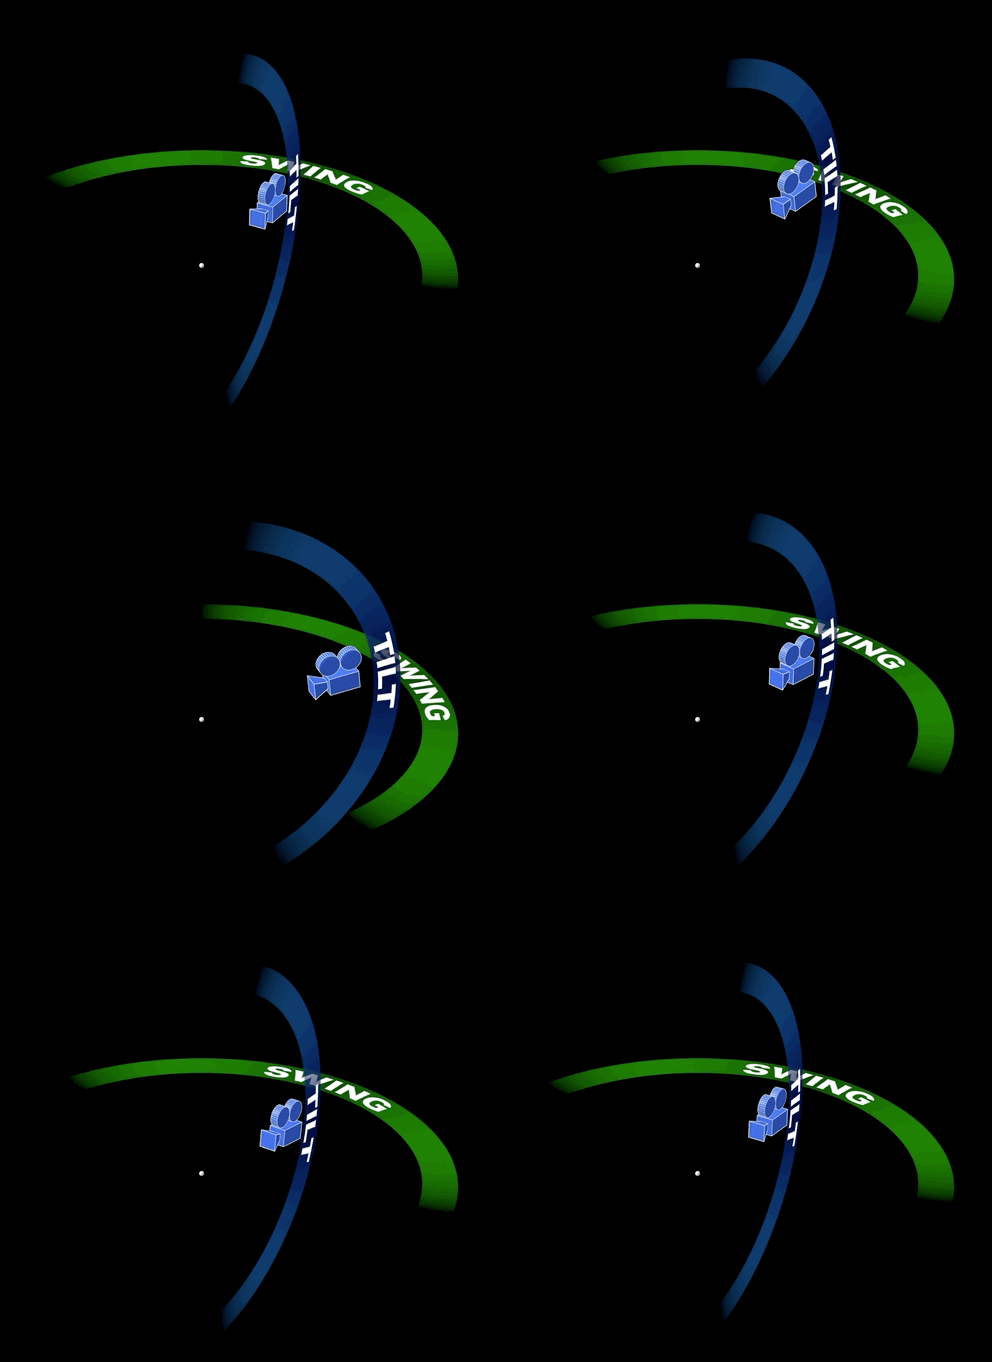
Third: rotation around the horizontal axis. That is Tilt. It angles the camera over or under the target, so it answers: from how high? Raise it for a top-down view that makes the subject feel small, or drop it low for an angle that makes the subject feel powerful.
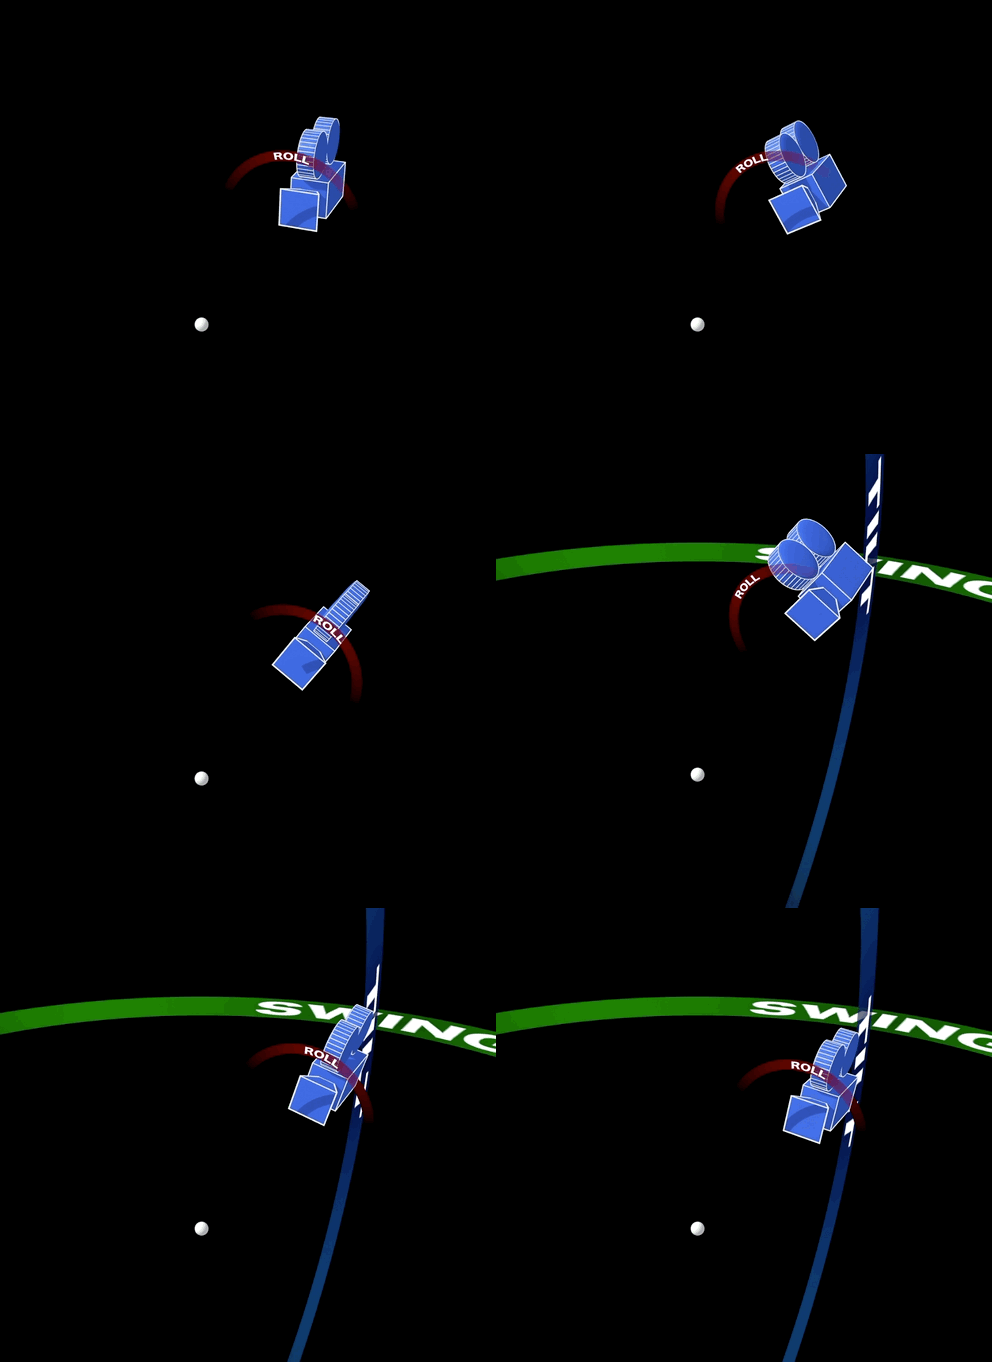
Fourth: rotation around the view axis itself. That is Roll. It spins the camera in place while it stays locked on the target, so it answers: how level is my shot? Zero keeps the horizon flat. Roll it off level and the same framing suddenly has attitude.
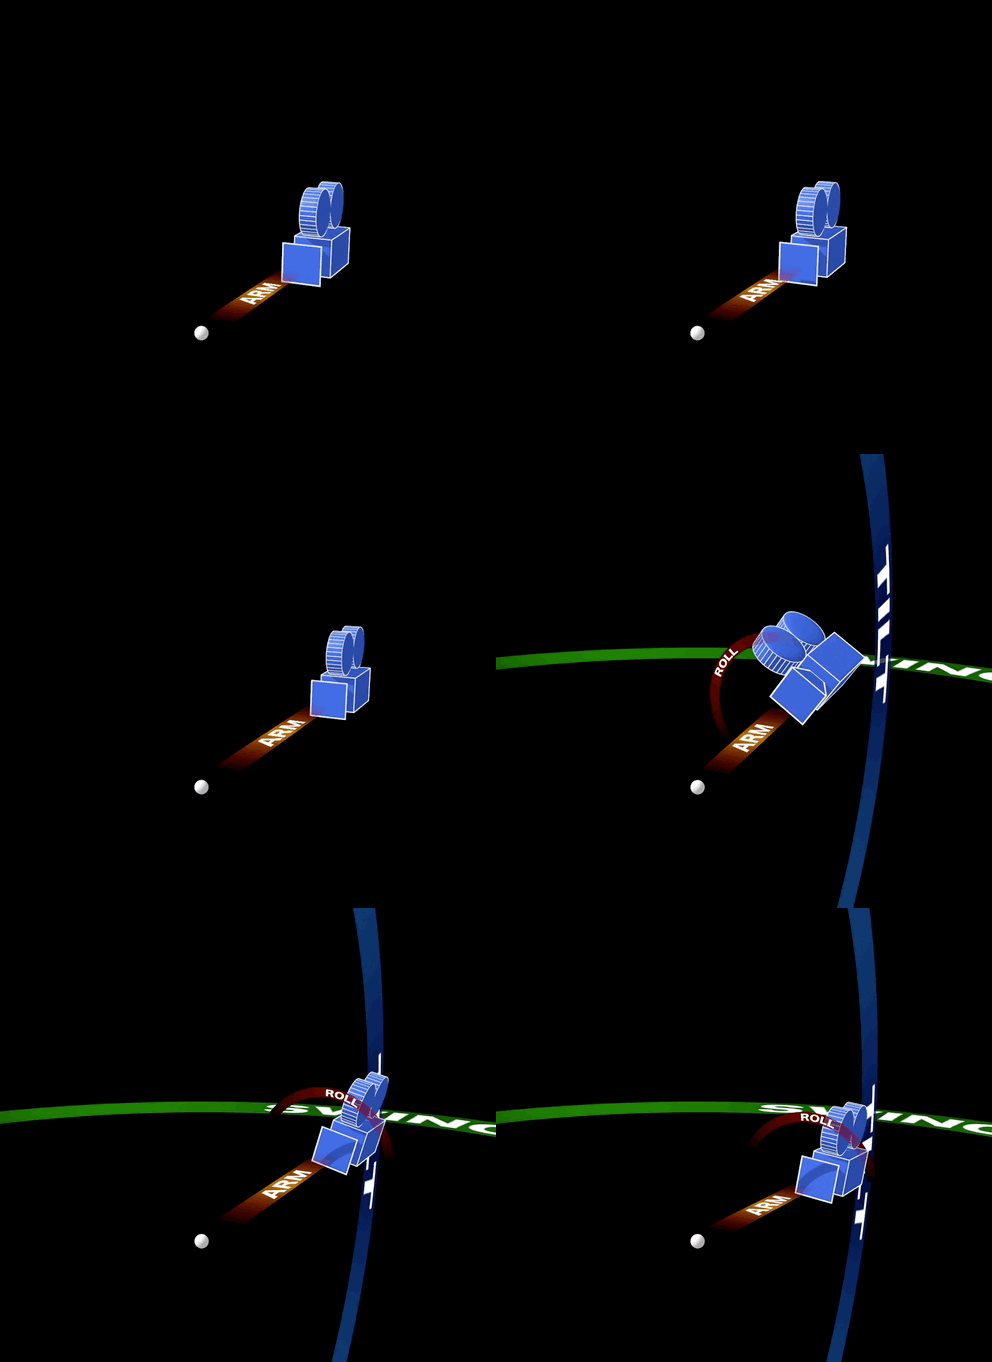
Fifth: the arm distance. The camera sits at the end of an invisible arm attached to the target, and this value slides it along that arm. It answers: from how far?
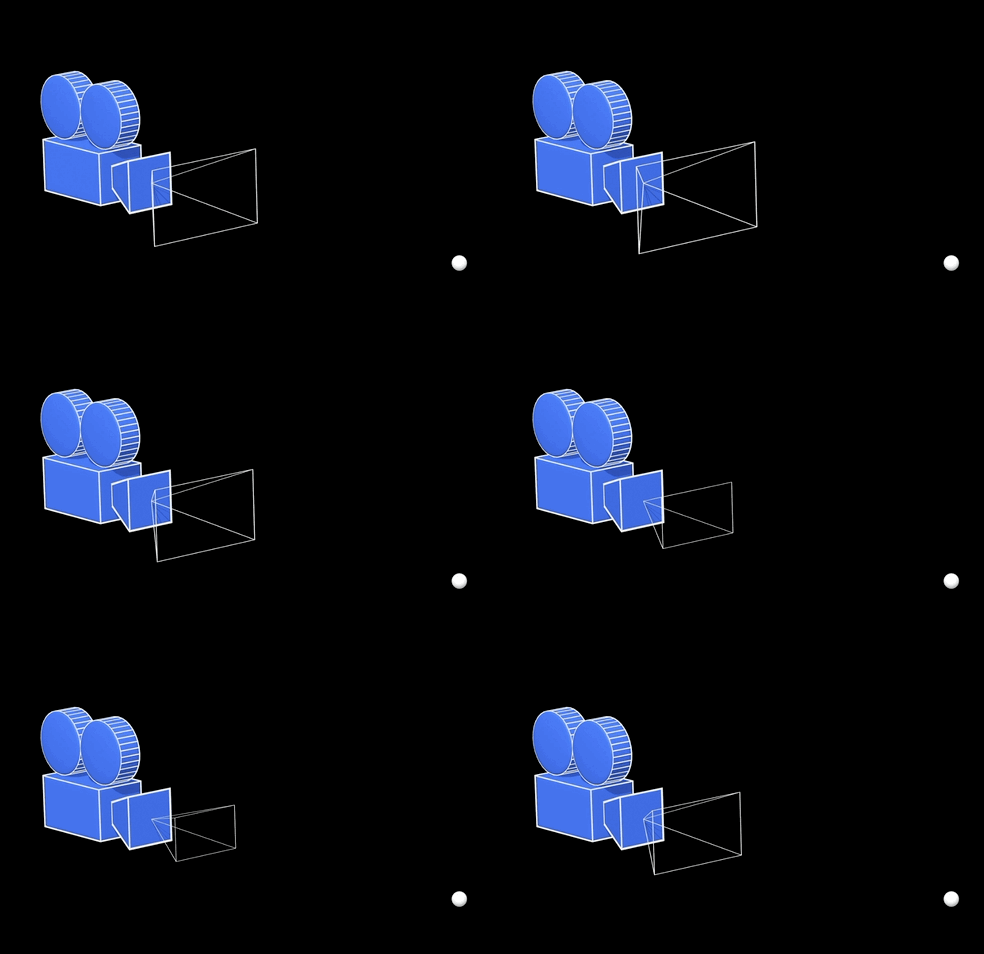
Sixth: the field of view. This is the lens. It sets how wide a slice of the world the camera takes in, so it answers: how wide is my view? Narrow for a tight, zoomed-in feel, wide to pull in more of the surroundings.
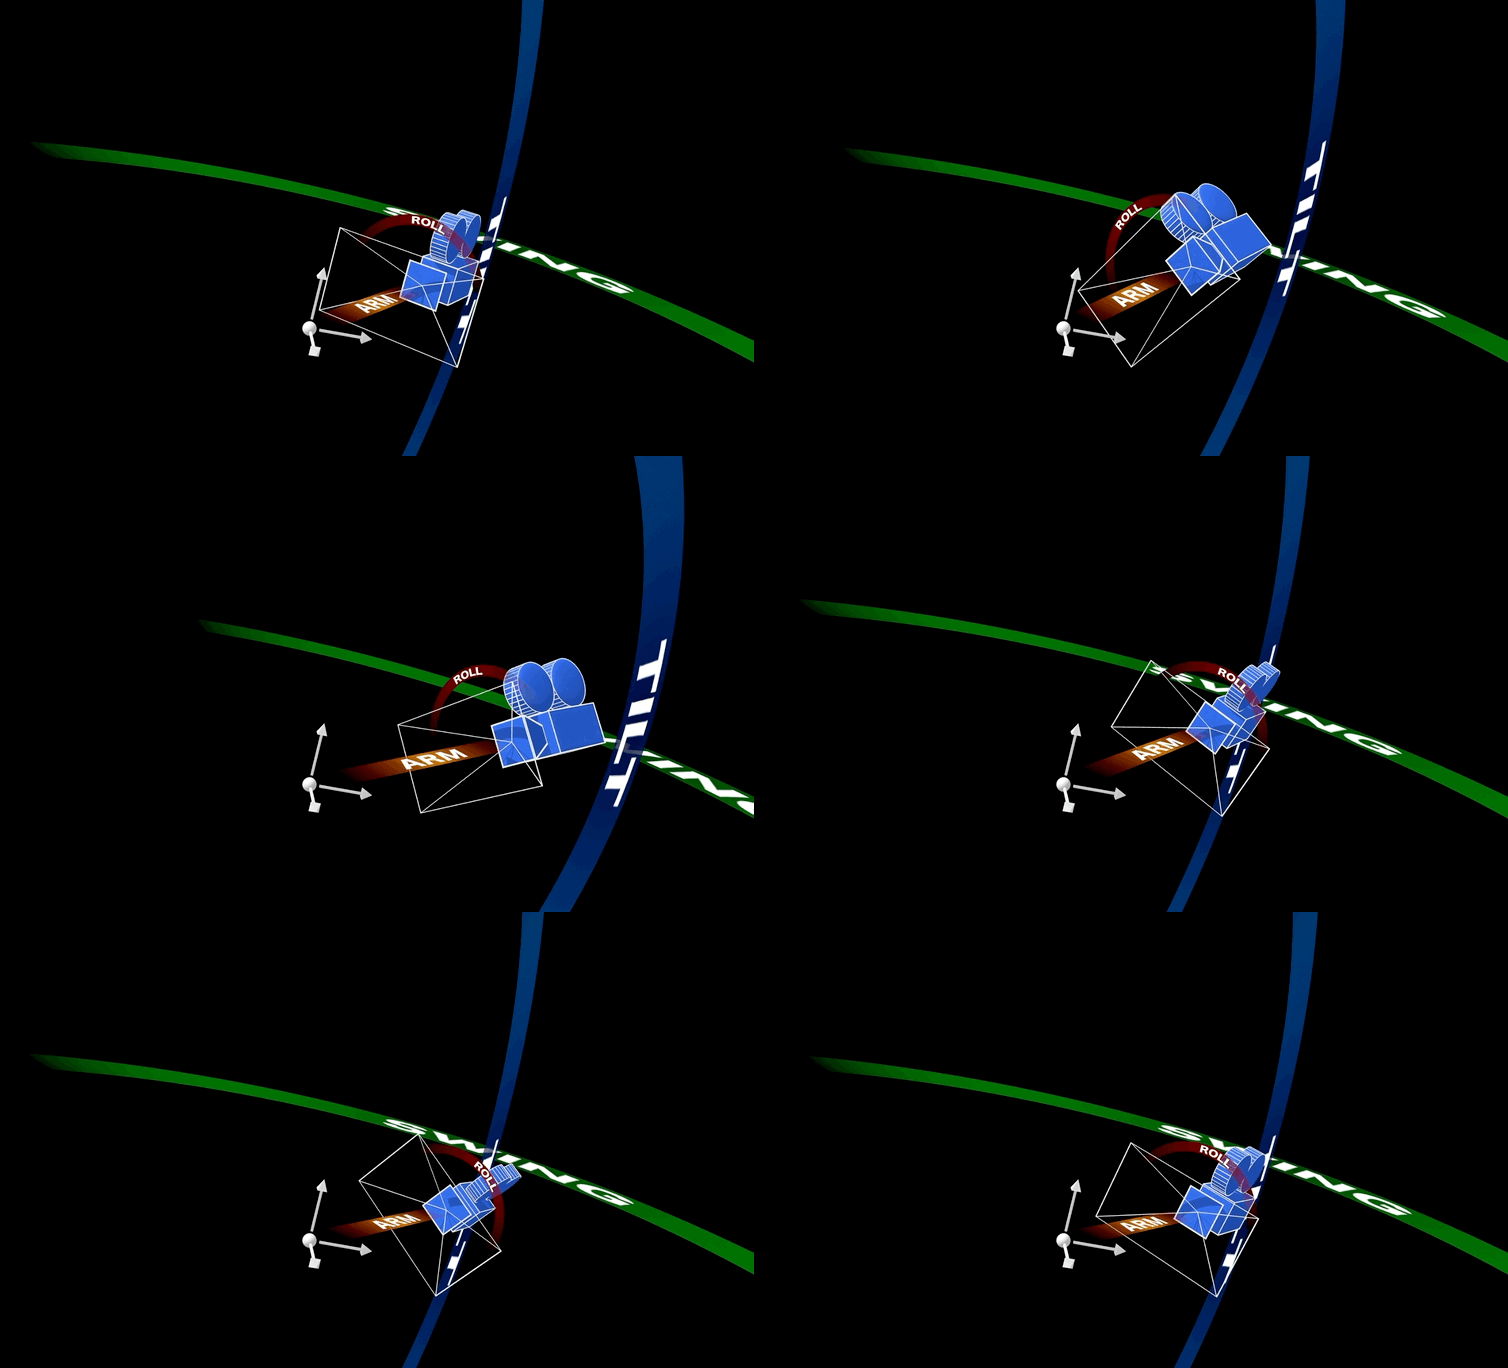
The camera is built for an efficient and practical aiming approach. Wherever the arm swings, it is always looking at the target. Posing a shot becomes six quick answers: what am I looking at, from which side, from how high, how level, from how far, and how wide. And every one of those answers is a single value that can be bound and animated later, which means a slow orbiting shot is nothing more than one number climbing over time. That is its own lesson.
One more reason to learn this setup well: it is not only for cameras. When you reach the Lighting course, you will find lights aimed with the exact same target, orbits, and arm. Learn it once here, and you already know it there.
The next lessons take these controls one at a time, starting with the target.
Recap
- A Kilona camera is built around what it looks at, not where it floats.
- Six values pose any camera: target position, Swing, Tilt, Roll, Arm Distance, and Field of View.
- Think of a camera crane planted at the subject: the arm swings, tilts, and extends, the camera can roll on its mount, and it always faces the base.
- There is no aiming step. The camera always points at the target.
- Lights use the same setup, so this lesson pays off twice.